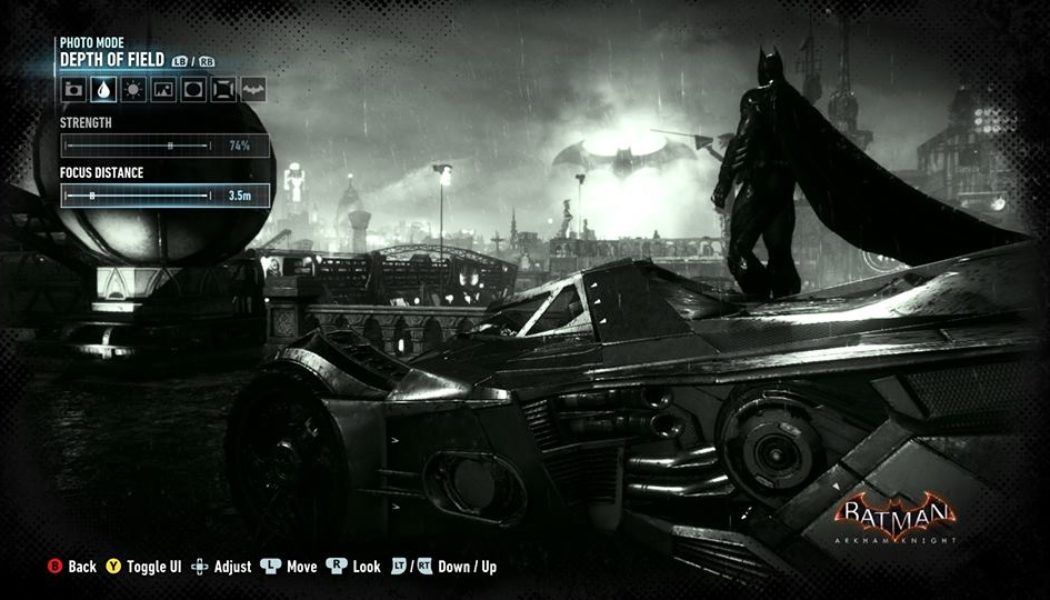
Batman Arkham Knight introduced an all new Photo mode in PS4 and Xbox One, you can check out the detailed review of the game here. The mode looks similar to the one which is present in Shadow of Mordor. I had a lot of fun using it and sharing our epic moments from the game.
We hope the photo mode also comes to PC soon, though the game has been held back on the platform. Here are the detailed steps on how to use it 🙂
PLAYSTATION 4
- While in the game, go to the Pause Menu.
- Highlight the Photo Mode option.
- Instructions on how to take and share will appear on the right side of the screen.
- Instructions on how to take and share will appear on the right side of the screen.
- Select Photo Mode by pressing the X button.
- You can also enable/disable Quick Photo Mode by pressing the Square button.
- Click L3 and R3 while in-game to instantly enter Photo Mode.
- From here, you can select several different options to set up your shot to your liking. Using the (L1/R1) to move through tab options.
- Camera:
- Ability to zoom and tilt the image.
- Ability to zoom and tilt the image.
- Depth of Field
- Adjust strength and focus distance.
- Adjust strength and focus distance.
- Image Control
- Control exposure and brightness.
- Control exposure and brightness.
- Filter
- Adds a lens filter to the shot.
- Options: None, Crusader, The Knight, Noir, Fear, Cold, Killing Joke, Poison, Film, Robin, or Toxic
- Vignette
- Adds a vignette to the shot and control intensity of the effect.
- Adds a vignette to the shot and control intensity of the effect.
- Frame
- Adds a frame to the shot and control intensity of the effect.
- Options: None, Asylum Black, Asylum White, Nostalgia, Batcomputer, Battle Mode, Swarm, Cinema, Border Black, or Border White.
- Logo
- Control what corner the Batman logo appears in, and the size (or can turn logo off).
- Control what corner the Batman logo appears in, and the size (or can turn logo off).
- Camera:
- Once you’re satisfied with the way your photo looks, press the share button on your PS4 controller.
- Press the Triangle button to save the screenshot.
- If your Facebook account is connected to your PSN account, you can then share your new screenshot to Facebook.
- Alternately, you can access your screenshots through the Capture Gallery.
XBOX ONE
- While in the game, go to the Pause Menu by pressing the Menu button.
- Highlight the Photo Mode option.
- Instructions on how to take and share will appear on the right side of the screen.
- Instructions on how to take and share will appear on the right side of the screen.
- Select Photo Mode by pressing the A button.
- You can also enable/disable Quick Photo Mode by pressing the X button.
- Click the Left stick and Right stick while in-game to instantly enter Photo Mode.
- From here, you can select several different options to set up your shot to your liking. Use the LB/RB to move through tab options.
- Camera:
- Ability to zoom and tilt the image.
- Ability to zoom and tilt the image.
- Depth of Field
- Adjust strength and focus distance.
- Adjust strength and focus distance.
- Image Control
- Control exposure and brightness.
- Control exposure and brightness.
- Filter
- Adds a lens filter to the shot.
- Options: None, Crusader, The Knight, Noir, Fear, Cold, Killing Joke, Poison, Film, Robin, or Toxic
- Vignette
- Adds a vignette to the shot, can control intensity of the effect.
- Adds a vignette to the shot, can control intensity of the effect.
- Frame
- Adds a frame to the shot and can control intensity of the effect.
- Options: None, Asylum Black, Asylum White, Nostalgia, Batcomputer, Battle Mode, Swarm, Cinema, Border Black, or Border White.
- Logo
- Control what corner the Batman logo appears in, and the size (or can turn logo off).
- Control what corner the Batman logo appears in, and the size (or can turn logo off).
- Camera:
- Your screenshot is now available in the Upload app under “My captures.”
- To share the screenshot, select “Upload” from “Games & apps.”
- Select “My captures” and select the screenshot you want to share.
- Press the “Menu” button and select “share”.
—You can only share your screenshots if you have an active Xbox Live Gold membership, or if you are using a home console for another Xbox Live Gold member. - Sign in to OneDrive using your Xbox live credentials and select the video that you just uploaded from your Xbox One.
- You can either download the clip, or play the clip and use the “Print Screen” button of your PC to capture the picture.
- You can then open the picture editing program of your choice, such as MS Paint, and copy your picture to that program.
- Save the picture in the format of your choice and the picture is now ready to be stored on your PC or uploaded to the social media site that you prefer.
Source: WB Community


